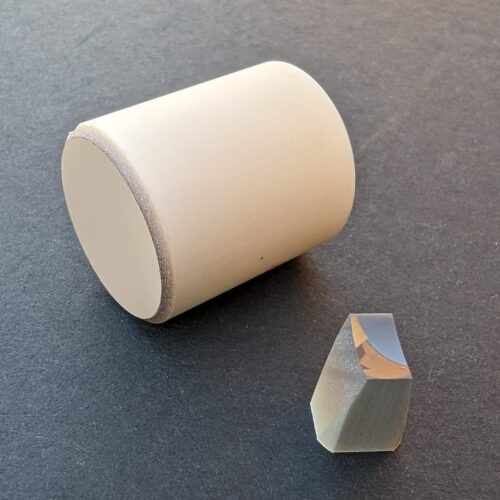
When a customer’s optical grinding project had shops that specialize in optical grinding saying, “No way,” Wagner said, “Sure, let’s figure it out!” And we don’t even own an optical grinding machine.
Keep reading to learn how we applied past experience, ingenuity, determination, and 5-axis machining services to make the impossible possible for this happy customer.
The Challenge: Grinding Angled Surfaces that Intersect with a Critical Spherical Surface
The customer’s project involved grinding a set of fiber optic bundles to mount flush with each other around a spherical lens. This required grinding angled surfaces that intersected the critical spherical surface with minimal chipping of the individual fibers along the edge.
The customer approached all their go-to optical grinding manufacturers with the design, and each one balked at the idea of grinding precise angled surfaces that intersected the spherical surface with no margin at the intersection.
The primary concern was chipping where the angled surfaces met the spherical surface, which was seen as impossible to mitigate. A secondary concern was the accuracy of the angled surfaces. Optical grinding generally revolves around flat surfaces that can be lapped and polished to the correct flatness and finish, or smooth optical profiles that have uncritical margin around the edges. The combination of critically located angled surfaces and no margin around the edges of the optical surface was a deal breaker for everyone in the industry.
So, they did what anyone does when they have a manufacturing project deemed “impossible”: they contacted Wagner Machine.
Wagner’s Solution: Proving the Concept with 5-Axis Machining Services

We had worked with this customer many times before, providing machining services for various optical assemblies. They had experience with our ability to CNC machine complex parts and develop innovative solutions. But they also knew that our shop didn’t have optical grinding equipment.
We all knew up front that we wouldn’t be able to achieve the level of accuracy they needed for functional optics but we were willing to help them prove their concept and address the edge chipping issue. Accuracy aside, the geometry and overall process didn’t seem that complicated.
Our solution started with temporarily converting one of our 5-axis mills to a very rough optical grinding machine. To understand how rough, most standard CNC machines specify a positioning accuracy in the range of .0002”. Some optical grinding machines can achieve .0000005” or better. With that in mind, we acquired custom designed optical grinding tools, cleaned our machine and coolant system thoroughly, and got to work!
Developing a process to rough grind the angles and spherical surface in one shot was not an issue. Fine tuning that process to resolve edge chipping at the interface required significant testing. We had never machined fiber optic material before, but we were able to draw on our experience machining complex geometries in other brittle materials, including various ceramics. After a week of testing and hundreds of adjustments to RPM, feed rate, order of operations, finish stock allowance, and tooling, we were able to consistently get the edge chipping down to around double the acceptable limit.
By that point, we were also starting to understand our variables, and were able to predict how various process changes would impact the edge chipping. We made a set of fiber optic components so our customer could test assembly procedures and performance. The optical quality was terrible, but they were able to learn a lot from this first sample batch including how edge chipping impacted image quality. Unfortunately, at that point our 5-axis machining capabilities had taken us as far as they could.
The Final Step: Renting an Optical Grinding Machine
With all that information and actual sample parts, our customer still couldn’t find any optical grinding companies to make the parts. But what they did find was an optical grinding machine to rent. They rented the machine near Rochester NY, and the next batch of testing began when the customer and Kurt Wagner decided to learn optical grinding together.
First, we had to learn to use the machine, which involved some complex programming. The machine couldn’t be programmed with conventional CAM software, so the math involved to make simple adjustments for the spherical surface and angles was taking forever. The customer used Python to create homemade “CAM software” to take care of all the math. It was our first time (and hopefully our last) using computer code to calculate CNC toolpaths, but it was fun figuring it out.
We’re pleased to say that all the effort put into this project paid off. With the process we had proven, programming help from our customer, and access to an actual optical grinding machine, we completed the parts to the customer’s stringent specifications. We helped our customer make something that had never been tried before and the project was successful. They even ended up buying the machine!
Wagner’s Commitment to Customers Knows No Bounds
Most shops would rather no-quote a challenging project than go through the trouble of figuring out how to make the impossible possible. But at Wagner Machine, we love stepping outside our comfort zone to experiment and innovate. Time and again, our willingness to go above and beyond leads to novel solutions and strengthens customer relationships. In our industry, it doesn’t get much better than that.
Request a quote, and see what we can do for you!
