We love playing games here at Wagner Machine—ask us about our team bowling or paintball outings next time you see us. One area, however, where we absolutely do not play games is quality and inspection.
Customers trust us to manufacture their complex machined parts to spec, and we take our role in getting them the parts they need extremely seriously. In fact, we’re willing to bet that we hold ourselves to even higher quality standards than most of our customers do.
Keep reading to learn why.
Inspection Procedures
While every part requires a customized inspection process, we have established a baseline requirement for every part. This baseline includes a combination of first part inspection by a department lead or our quality department, a series of in-process checks by our machinists, and a final inspection completed by our quality department. Any of these steps may include a combination of manual, CMM, or optical inspection depending on part geometry and requirements.
In-process inspections often require carefully adjusted prints and tolerances to account for subsequent machining or finishing operations. For example, if a part will be hardcoat anodized or plated, tolerances need to be adjusted to account for coating buildup to ensure the final part is in spec after the plating process. In other cases, certain features might need to be held tighter than the print tolerance if they will be used to locate the part for a subsequent operation.
Regardless of how our in-process inspections are modified, our final inspection is always completed to the exact dimensions and tolerances stated on the customer-supplied engineering drawings to ensure our customers receive exactly what they order.
Assessing risk to determine inspection requirements

Customers often define inspection frequency and procedures for parts that are used in critical applications. Even when that is the case, we might choose to inspect more frequently or to tighter tolerances than the customer requires. We determine inspection requirements on a part-by-part basis depending on customer input and our internal level of risk associated with a project. Ultimately, our goal is to calibrate our inspection requirements so that you get the parts you need without having to pay for extra work that won’t add value.
We look at three broad categories to break down our internal risk: process reliability, inspection, and cost of scrap. The higher our risk across these three categories, the more frequent our inspections will need to be, so a lower score is better. Increased inspection might apply to the whole part or only to specific part features or operations.
Process reliability includes everything related to how consistently a part or feature can be machined. Brass and aluminum parts often score very low because they can run unattended for a long time with very little tool wear. Parts made from Titanium or Inconel might have a high score because of poor tool life. Features that require extremely small tools or tight tolerances can also increase this score.
Inspection might sound self-explanatory, but it is one of the largest factors in determining risk. Parts that are over dimensioned, or with dimensions that are difficult to measure with high repeatability can cause serious production problems. A couple tight tolerances will not necessarily increase this score, but if there are many tight tolerances that are difficult to verify, the inspection frequency is going to increase.
Cost of scrap is about more than just material cost. Scrap parts require rework hours that tie up employees and equipment. They can lead to scheduling problems that disrupt entire departments and may require expedited shipping or rush charges for outside processes. The disruption is almost always more costly than the material, so a higher cost of scrap is a major factor in determining inspection frequency.
Issues with any of these three categories can make or break a job. Determining the correct inspection frequency and procedures always outweighs the risk of making bad parts.
Inspecting Parts That Run Unattended
Our precision machine shop leverages lights-out machining to run parts overnight, and we have several processes in place to ensure that these parts are adequately inspected.
When we open the shop in the morning, one of our operators will inspect the last part to come off the machine overnight. For most parts with standard tolerances, if this final part is in spec, and the last part from the previous day was in spec, we are in good shape. There are cases where we check a random sample of the unattended production parts depending on tolerance requirements and process reliability. We also use tool detection and in-machine probing to ensure reliable operation as necessary. If any checks identify an issue, we’ll isolate any nonconforming parts for scrap or rework.
The Right Approach and the Right Equipment
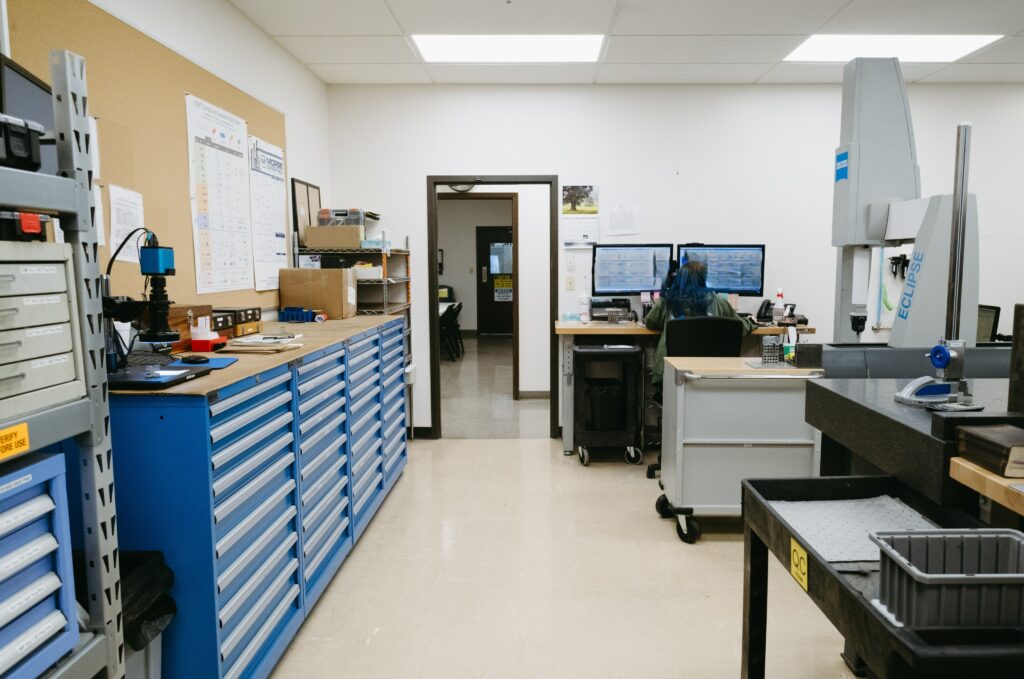
Our rigorous approach to quality and inspection wouldn’t be possible without the right equipment to support it. We’ve invested in a fleet of world-class inspection equipment for our precision machine shop:
- Zeiss Eclipse 5-Axis Bridge Style CMM – Renishaw PH20 Probe
- Keyence IM-7030T Image Dimension Measuring System (2 available)
- Creaform HandySCAN BLACK Elite 3D High-Resolution Laser Scanner
- Romer Portable CMM
- Clark Hardness Tester
- Profilometer
If you’re looking for a precision machining partner who doesn’t play games with inspection, you can trust Wagner Machine. Request a quote to work with us.
