You probably don’t realize it, but when you step inside businesses, restaurants, and schools, there’s a good chance you’re standing on floors made using the waterjet process. We know that because our shop has used waterjet cutting services to create custom floors for many customers over the years.
Waterjet cutting is a relatively simple process that allows us to cut virtually any type of material in any thickness to any 2D geometry our customers can dream up. The tolerances are very tight so mating parts with complex designs is a piece of cake. In other words, it’s a perfect solution for cutting flooring materials from tile and metal to vinyl or wood into specific logos or designs.
Here’s a deep dive into two of our favorite custom flooring projects we’ve completed in our nearly 20 years of providing waterjet cutting services.
The Tuscola High School Project
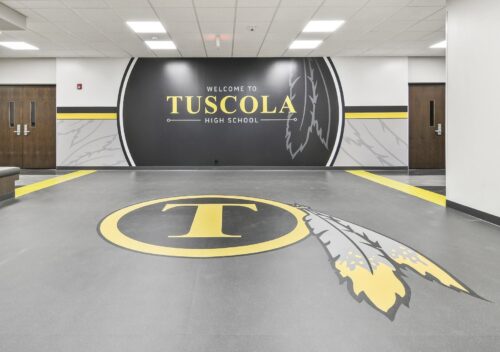
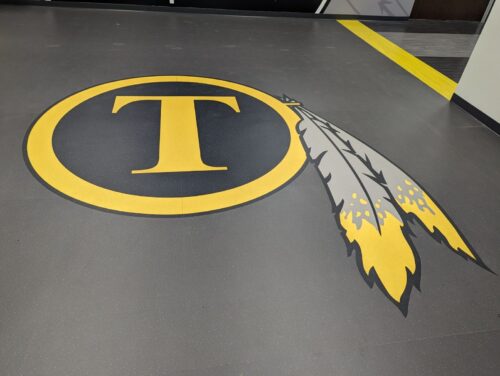
When the nearby Tuscola High School needed a large logo cut from vinyl flooring material, our Illinois machine shop jumped at the opportunity.
Determining how to make a logo bigger than our machine

The customer sent over the logo in a raster file. We knew we couldn’t use this file to program our machine, but we could at least view specifications like size, colors, and material.
The size of the logo was the initial challenge we would need to overcome. Our waterjet is an OMAX 55100 and it can accommodate pieces of material up to 4’ x 8’. The diameter of the logo was over 8’, so we were going to have to split it.
So we did what we always do when faced with a difficult project: we asked questions and presented potential solutions. We have a lot of experience splitting up large designs, so we offered multiple options for the customer to choose from. They were receptive to splitting it up since they couldn’t even find material large enough to create the entire logo in one piece.
Converting the raster file to a vector file
The customer gave us the material and the green light to split the logo into pieces. But we still didn’t have the correct CAD models with vector geometry to program our machine. They were not able to provide additional formats, so we converted the raster file to a vector file and cleaned up the geometry. We don’t like to approximate files, but since we were making all the mating components, we were sure everything was going to fit great.
Discussing the layout and geometry
Before we cut anything, we provided the customer with a detailed layout of the logo, including all the individual pieces so they could see where the seams would appear. The customer provided some final feedback, and we adapted the layout accordingly.
During this process, we brought their attention to some narrow, sharp points on the logo that we thought might pose a durability issue over time. We worried these points would peel up from the floor due to foot traffic, so we recommended minor modifications to optimize the logo for its application. We gave pros and cons of different options and ended up modifying the logo to improve durability without changing the overall look.
Finding the right fit
The customer provided samples of the vinyl flooring material so we could perform some test cuts and ensure all the pieces fit correctly. We weren’t sure if they wanted a tight fit, a loose fit, or something in between. Different customers and installers have widely varying opinions on this depending on the flooring material, so we always check.
The dimensional differences were so minor that it was hard to describe the fit, so we provided sample parts for three different clearance options. They told us their preference, and we got to work cutting the pieces.
Simplifying the installation process

Because the logo comprised many small pieces that could only fit together one way, the customer was concerned that the installers would have difficulty putting the pieces together. This was going to be particularly tricky for some of the small spots on the feathers. To proactively address this issue, we provided an overall layout and numbered the pieces on the back.
The project was a big success, and the logo looks great.
Believe it or not, this project wasn’t even close to the most complicated flooring project we’ve completed with our waterjet cutting services…
The Jimmy John’s Project
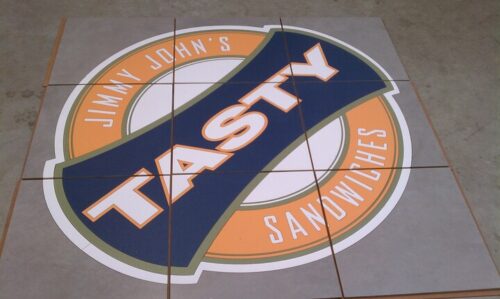
Sandwich chain Jimmy John’s needed a colorful logo with complicated geometry cut from ceramic tile. The logo comprised 100+ separate pieces split among four or, in some cases, nine different tiles.
Like our other customer, Jimmy John’s voiced concern about their installation team having to place all those pieces individually.

Wagner Machine cut all the pieces and created a template to lay them on to ensure they were the right sizes. Then, we went a step further, actually gluing the tiles together with an adhesive backer material. We were able to deliver this complex project as one large piece with all the smaller pieces already put into place so it installed like regular square tiles.
Needless to say, the customer was thrilled with our time-saving solution. Unfortunately, unless you go into a Jimmy John’s in Champaign or Urbana IL, you are unlikely to see one of these. Waterjet cut tiles for hundreds of stores wasn’t cost effective for a sandwich shop, so they decided on a printed design for the nationwide rollout.
If you now have a desperate need to visit Champaign to see the original waterjet cut Jimmy John’s tiles, make sure to give us a call and we would be happy to show you around the shop. We might even buy you a sandwich!
Nearly 20 Years of Expert Waterjet Cutting Services
We’re proud to offer waterjet cutting services at our Illinois machine shop, along with an extensive list of other in-house services you won’t find at just any shop. Our team would love to take on additional custom flooring projects—the more complex, the better!
Let us make the impossible possible for you. Request a quote.
